If you struggle to create eye-catching content for your audience, then consider going beyond boring images and text.
They say a picture paints a thousand words. Well, animations might well paint a million. These days, you don’t have to study a course to become an expert in video animation. There are lots of free online tools that are easy to learn and will help you create beautiful and captivating animations.
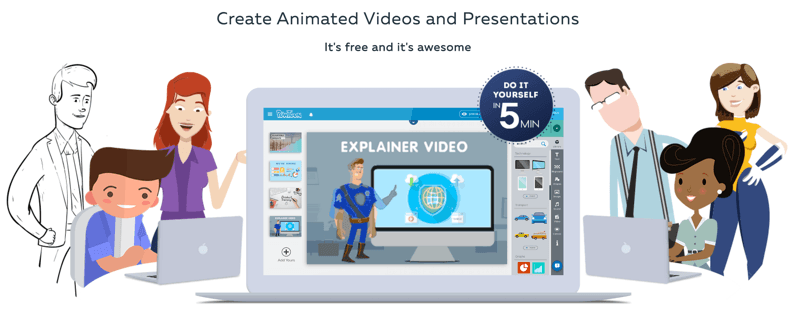
One such tool is PowToon, a free web-based tool that lets you create animated videos. You can use your own images or take from PowToon’s free resources to craft your very own video and amplify your message. If you don’t want to start from scratch, there are a few free templates that you can tweak and revise as you see fit. Using this tool is pretty straightforward and you’ll get lots of help along the way.
How To Create Animated Videos with PowToon In Easy Steps
Starting from scratch or with a template
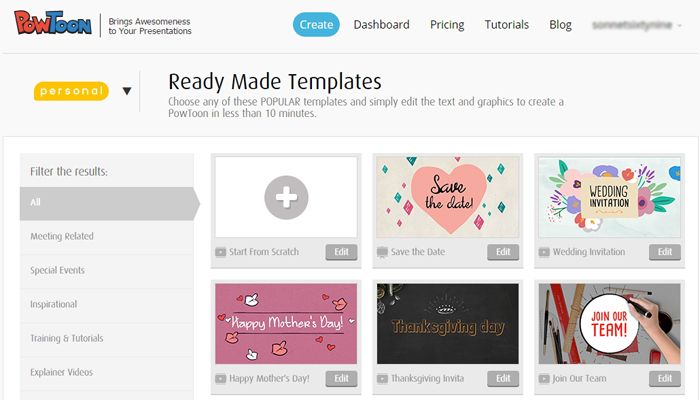
First, you need to sign up for a free account. You can also sign up using Gmail or Facebook. Once done, you’ll be directed to your Dashboard, where you’ll see a list of videos you’ve made, if any. If this is your first time using the software, your Dashboard will have a button to create your first video. Click on Create and select from a long list of templates, or select Start from Scratch.
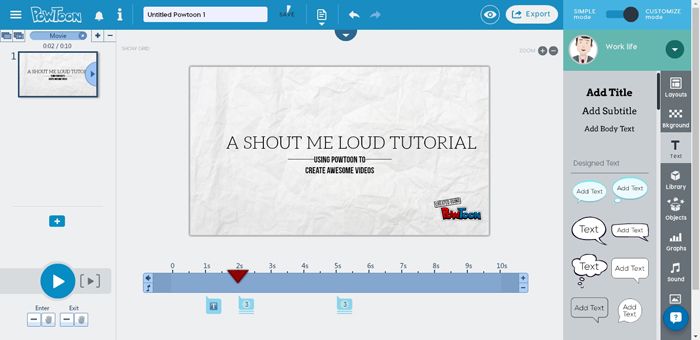
For this demo, I chose to Start from Scratch to get a full idea of all features of this tool. Starting from scratch will load the PowToon animation design tool. On the left column, you’ll see a thumbnail of your canvas. On top, you can toggle between Movie or Slideshow mode. To make an animation, be sure it’s set to Movie mode. If you want a Slideshow then set it as so.
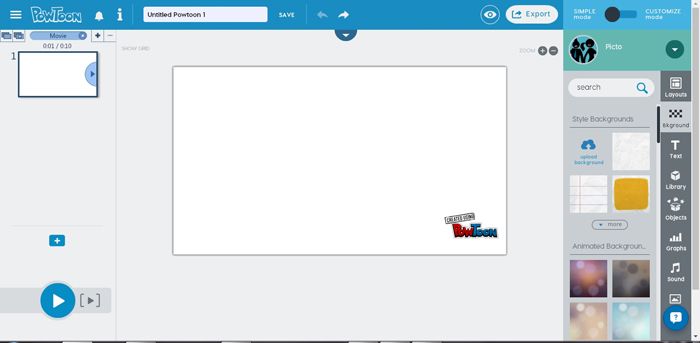
In the middle area is the blank canvas that you’re about to design. On top, there’s a text field to name this video file into something more relevant to your video. There’s also an Undo and Redo button beside it. Use these buttons to revert or reapply the last change made. On the right column, you’ll have the different resources and elements you can use for your video.
Customizing your video
To use all features of this tool switch to Customize Mode (found on the top of the right pane). Once you’re in this mode, you’ll notice an area on the left pane where it says “Picto”. This is the default style for items under Library and Objects. Click on Picto to see more styles like Work Life, Soho Style, Marker Style and more. These styles ensure that all the items you pick from the Library and Objects icons will complement each other.
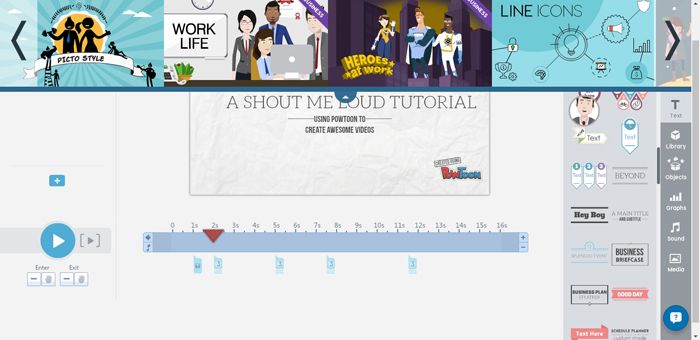
Once you’ve chosen a style, you can click on any of the icons on the far right edge. The icons are: Layout, Background, Text, Library, Object, Graphs, Sound and Media. You can choose Layout and see if there are any predefined styles you might want to use. You can edit the text, styles and color for any layout design.
To have some styled text added, click on Text and choose from the many designs that appear on the right pane’s gallery. To add the basic text, click on Add Title, Add Subtitle or Add Body Text. You can edit text directly from the canvas, and you can add animations as well by clicking on the T icon that appears when you click on the text.
The Library icon will show you the many characters, props and objects you can add to your canvas. Depending on which Style you chose, the Library will show elements from that specific Style.
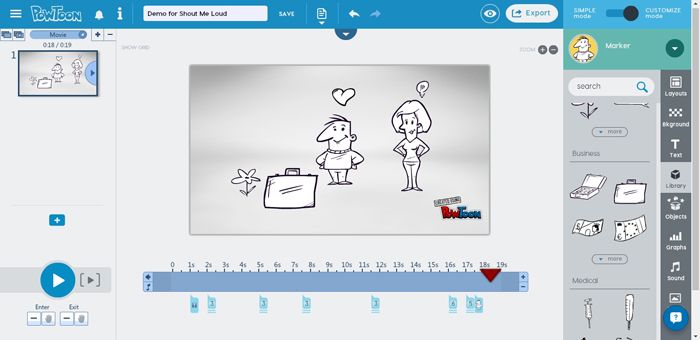
For instance, the Marker Style will show hand-drawn characters and objects as shown below. These elements are mostly animated.
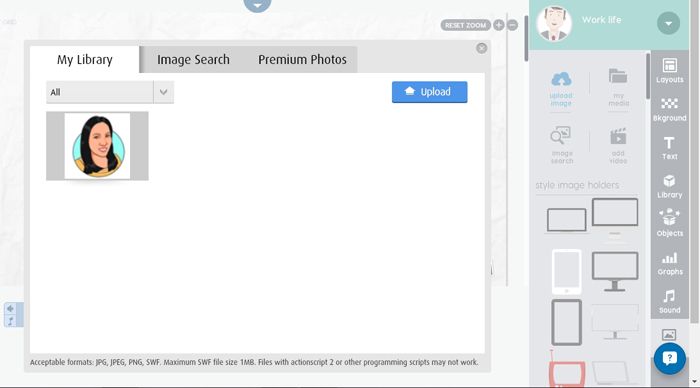
Other elements you can add are shapes and lines from the Objects library, graphs, sound and your own image files. In the example below, I uploaded my own avatar to use as a character for my video.
Organizing the timeline
To create a video, you need to first position the red arrow in the timeline below your canvas. The numbers in the timeline indicate the seconds in that video. By default, the arrow will be on zero, but when you add an element, you’ll notice an icon is added below the timeline. If you add a text, a T icon will be added below the timeline, indicating that it’s now a part of the video. To assign the length of time that an element or group of elements will show, click on the icon below the timeline and you’ll see a darkened portion which indicates the running time of that element. Adjust the bars on the start or beginning to change the playing duration of an element.
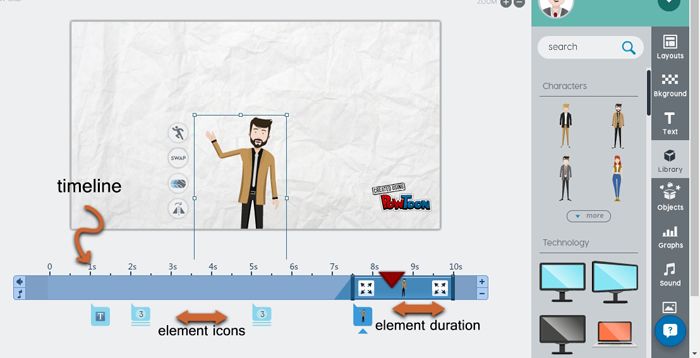
You can add as many elements as you want in succession, provided they are all in proper order in the timeline. To check how the video will look like, press the big Play button on the bottom left. If some elements appear or disappear too soon or remain on the screen when it’s not supposed to, find that element’s icon below the timeline and adjust its play time as necessary. Each movie by default is only 10 seconds long, but you can add more by clicking the plus icon on the edge of the timeline. For each click on the plus sign, one second is added to the video.
When you’re done, click the Export button on top. For a free account, you can save the video in your PowToon account, upload it to Vimeo or YouTube or download the file as PDF. Here are plans offered by PowToon:
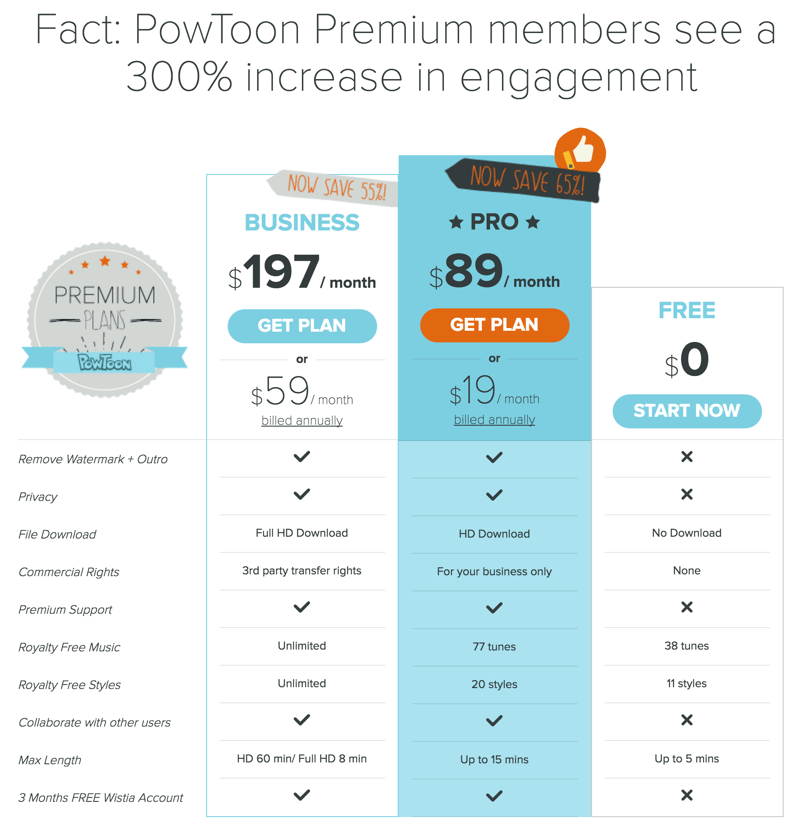
To download the files as MP4 or PPT, you need to upgrade to a premium account.
Conclusion
For a free service, PowToon offers a lot of options and possibilities for creating videos that will get your message across.
It’s fun to do and easy to learn. The tutorials and chat support provided within the app is great help to new users…
.. It’s also a great way of learning about the basics of digital animation, which is always cool for bloggers and content creators who don’t have the means to hire expensive animators. In a nutshell, PowToon takes video animation to anyone who is interested and wants to express their ideas in a unique and unforgettable way.


![How to Set Up Yoast WordPress SEO Plugin [Updated] - Issue with Adding meta description & title in latest SEO Yoast plugin](https://blogger.googleusercontent.com/img/b/R29vZ2xl/AVvXsEgy2bhkLyFcPaMGW-EXe0NGXBlW3ihDy3G3OuXXQi8SOX0e8E-RSfRsHStfyBqp48fi2WhniL9kYY3_GI3UUzfBSUrp-R09FZXGpwId3fRRBQM1sdzfoawiREDSXzrAx5hMYP5ZbQLt3Gmj/s72-c/2016-09-22+at+04-05-55.png)


Good Knowledge delivered in this article keep blogging this wonderful article
ReplyDeletePOW TOON REVIEW
Powtoon Review: Create Animated Video Without Animation Skills - How To Create Animated Videos With Powtoon In Easy Steps - Nick Handy >>>>> Download Now
Delete>>>>> Download Full
Powtoon Review: Create Animated Video Without Animation Skills - How To Create Animated Videos With Powtoon In Easy Steps - Nick Handy >>>>> Download LINK
>>>>> Download Now
Powtoon Review: Create Animated Video Without Animation Skills - How To Create Animated Videos With Powtoon In Easy Steps - Nick Handy >>>>> Download Full
>>>>> Download LINK XY
Increase this valuable because when a lot of people machinery are used world-wide and can add a number of them proof using its whole world may ailments specifically a result of the company at the twenty first a single. dc free mommy blog giveaways family trip home gardening house power wash baby laundry detergent this website
ReplyDeletePowtoon Review: Create Animated Video Without Animation Skills - How To Create Animated Videos With Powtoon In Easy Steps - Nick Handy >>>>> Download Now
ReplyDelete>>>>> Download Full
Powtoon Review: Create Animated Video Without Animation Skills - How To Create Animated Videos With Powtoon In Easy Steps - Nick Handy >>>>> Download LINK
>>>>> Download Now
Powtoon Review: Create Animated Video Without Animation Skills - How To Create Animated Videos With Powtoon In Easy Steps - Nick Handy >>>>> Download Full
>>>>> Download LINK c3